
Inspect the Microduck robot head design from photos
Learn how to visually inspect Microduck robot head features from images: identify the yellow ring and black circular element likely indicating a camera or sensor, note visible cables and neck connections, perform multi-angle photography and close-up checks, and produce an inspection checklist with follow-up verification steps and required tools.
Image Analysis
Image 1 — evidence summary
Readable text / UI steps / chart data
- No readable text, user interface steps, or chart data were observed.
Facts (only directly visible phenomena)
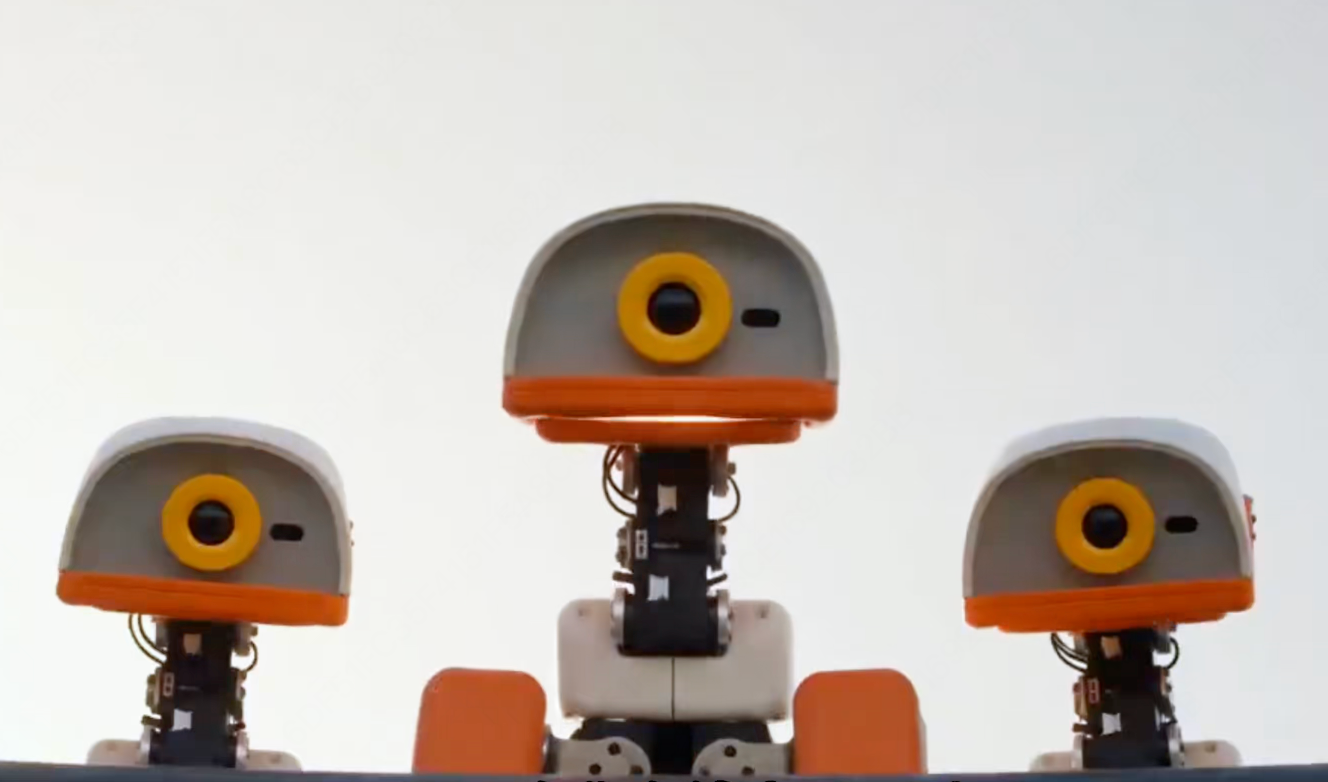
- The image shows three similar mechanical heads/devices arranged left, center, and right.
- The head housings are light gray/white, with orange trim or edging around the outer edge or lower rim.
- Each head has a prominent yellow ring at the center; inside the ring is a black circular structure (possibly a lens or sensor).
- To the right of the yellow ring (from the viewer's perspective) each head has a small black oval/rectangular opening or mark.
- The three heads are connected to a base via visible mechanical necks; metal structures, hinges, cable bundles, and fasteners are visible at the necks.
- The central head is higher than the left and right ones and appears visually centered and closer to the viewer.
- A dark horizontal edge or rail is visible at the bottom of the frame; the heads appear mounted above or behind it; there are orange square-like structures lower left and right (possibly shoulder covers or supports).
- The background is light and uniform (sky or single-color); lighting comes from behind the device (backlight/high backlight), producing highlights on the head edges.
- Cables or flexible wire bundles are visible between and inside the necks.
Unreadable/uncertain content
- Small numbers or markings appear on the head surfaces or neck metal parts (possibly “8” or other characters), but resolution/angle prevents identification — unreadable.
- Specific details of the black circular structure inside the yellow ring (e.g., whether it is a camera lens, cover, reflection, or another sensor) cannot be confirmed from the image alone.
- The exact function of the small black oval/rectangular openings (e.g., microphone, status LED, intake, or decoration) cannot be determined.
- The exact function or shape details of the lower orange square-like structures (button, cover, or other) are unclear.
Hypotheses (labeled as hypotheses, not direct observations)
- The black circular structure inside the yellow ring is likely a camera lens or optical sensor (based on appearance); the yellow ring may be decorative or protective.
- The small black oval/rectangular features may be status LEDs, microphone openings, or auxiliary sensors.
- The three devices may be robot heads or interactive modules (based on mechanical necks, cabling, and eye-like design).
- The central device being higher may indicate a primary unit, with side units as secondary modules.
- Backlighting indicates the light source was behind the device or near the horizon (possibly natural sky light), so frontal detail is limited by backlight.
Notes
- No identifiable explanatory text, UI instructions, or charts were found; only visible evidence and reasonable hypotheses were recorded.
SkillPI Creation Analysis
Purpose of the material:
- This source is a short-video/image summary showing the appearance and visible features of a robot called “Microduck,” useful for visual identification, preliminary inspection, and listing items that require verification.
Key image evidence (summary):
- Three similar mechanical heads, light gray/white housings with orange trim, yellow rings surrounding a black circular structure, visible cables and metal necks, central head higher and closer to viewer; backlit conditions limit frontal detail.
Associated skills and practical steps (note: no verified skill name was provided in the input; below are general visual inspection and photo-analysis steps to guide an inspection workflow):
1) Initial visual survey: confirm overall layout (count of heads, positions, colors, decorative rings, visible openings) on high-resolution photos or the device.
2) Capture multiple angles: photograph the device from front, sides, rear, and close-up details; use fill light to reduce backlight issues.
3) Magnified detail inspection: capture close-up images of the black circular structures within the yellow rings to determine presence of a lens, reflections, or apertures; inspect the black oval features for hole patterns or LEDs.
4) Connector and neck inspection: examine cable routes, connector types, fasteners, and any markings at the neck and mounting points.
5) Functional checks (if permitted): where safe and permitted, power the device to test camera/sensor outputs or status indicators using appropriate viewing equipment.
6) Documentation cross-check: search for model labels, manufacturer documentation, or online references to verify component functions.
Prerequisites for reproducing an inspection/analysis:
- Access to the device or higher-resolution images;
- Photography equipment capable of close-ups and controlled lighting to mitigate backlight;
- Basic tools for non-destructive inspection;
- Test equipment for electrical or video output checks if functional verification is needed;
- Respect for warranty and safety constraints when opening enclosures or powering the unit.
Items to verify (cannot be determined from the current image alone):
- Whether the black circular structure inside the yellow ring is actually a camera lens or another optical sensor;
- The function of the small black oval/rectangular openings (microphone, LED, vent, or decoration);
- The purpose of the lower orange square-like structures;
- Cable functions and signal types routed through the necks;
- Presence of model or serial markings to identify the product and locate official documentation.
Limitations and disclaimers:
- This interpretation is based solely on the provided summary and image evidence; it does not include functional tests or vendor documentation verification. To confirm component functions and specifications, obtain higher-quality images, direct access to the device, or official technical documents.