
Made a photo-deconstruction skill
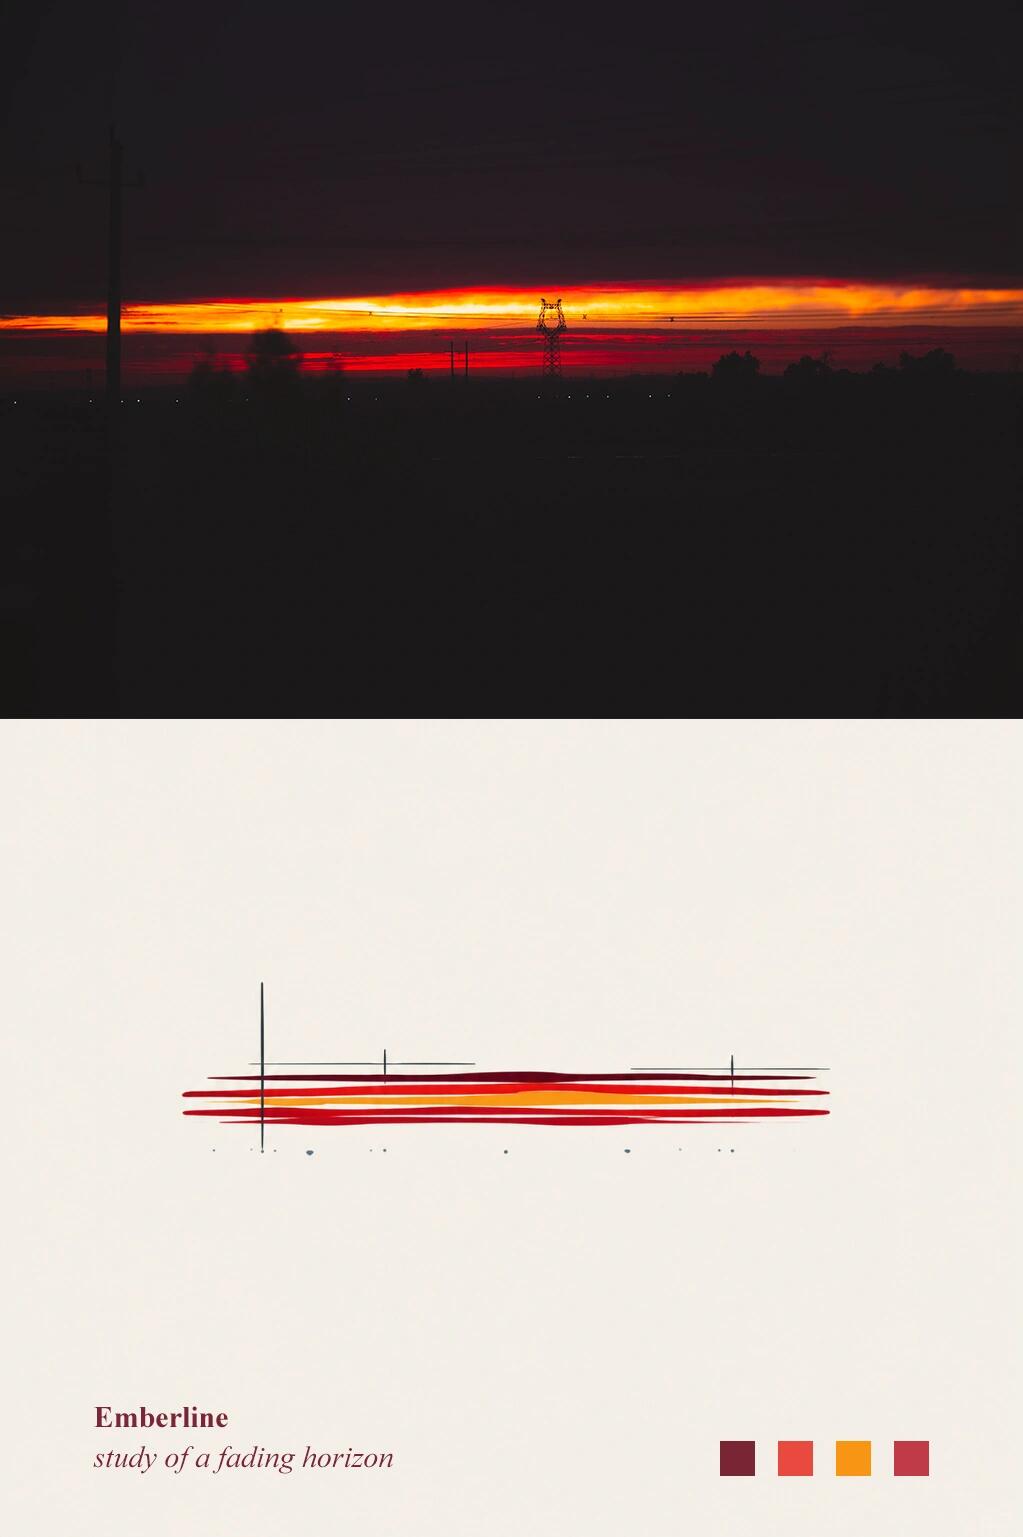
Step-by-step approach to turn a landscape photo into a split-layout color-strip poster: extract the horizon colors, sample warm tones, build horizontal color bands, add thin guide lines and typographic title/subtitle, and export a poster-ready color palette and layout files.
Image Analysis
Image evidence summary (image 1)
Facts (directly readable or clearly visible)
1. Layout and composition
SkillPI Creation Analysis
Purpose of the piece:
The work juxtaposes a dusk/night landscape photograph with an abstracted color-and-form study of that photograph. It functions as a visual study, palette display, editorial poster or design specimen showing how a photo's horizon and warm tones can be abstracted into a color-strip poster and swatches.
Key image evidence (summary):
- Two-part layout: top is a high-contrast dusk landscape with horizon light band, transmission tower silhouettes and linear lights; bottom is a light-beige poster area containing the title (Emberline), subtitle (study of a fading horizon), horizontal color bands, vertical/tick lines, a dot row and four color swatches in the lower-right.
Practical steps to reproduce this style (generic, tool-agnostic workflow):
1. Choose and crop the source photo so the horizon and light band are emphasized (top half of the poster).
2. Sample colors from the horizon/light band using a color picker to create a warm-tone palette.
3. Create horizontal color strips from sampled colors (vector rectangles or raster bars) and arrange them in order to reflect the photo's tonal progression.
4. Add thin vertical guide lines and horizontal tick marks to imply alignment with landmarks; place a small dot row to suggest annotation or data placeholders.
5. Set typography: serif for the main title (e.g., Emberline), italic small lower-case for the subtitle. Adjust kerning, weight and alignment for a minimalist editorial look.
6. Place color swatches (square blocks) in the lower-right to display the final palette and export hex/RGB values for each swatch.
7. Export poster and preserve editable source files (PSD/AI/Figma) for future edits.
Prerequisites (what you need):
- The original high-resolution photo and permission to use it;
- A design/editing tool capable of color sampling and layout (e.g., Photoshop, Illustrator, Figma or similar);
- Access to the serif and italic fonts used or suitable substitutes;
- Ability to export color values and high-resolution poster files.
Items to verify (cannot be confirmed from the image alone):
- Whether the bottom graphic was produced by an automated "skill"/plugin or created manually by a designer;
- Exact font names and styles used for title and subtitle;
- Precise color values (HEX/RGB) of the four swatches and sampled points on the photo;
- Whether the dot row or ticks correspond to specific numeric labels or metadata;
- Source photo metadata (time of capture, equipment, licensing).
Next steps and options:
- I can produce a step-by-step template for recreating this layout in Photoshop/Illustrator/Figma if you provide the source photo and desired output size/link to the original post: https://www.xiaohongshu.com/explore/6a72f6ac000000003300dadf
(Note: The above are process recommendations and inferences based on visible evidence; they do not claim that a specific automated or third-party skill was used.)